Easy Rocky Road Candy Recipe with Biscoff Cookies
There is something undeniably satisfying about a classic no-bake dessert. You get maximum reward for minimal effort, and often the results are more crowd-pleasing than a complex pastry project that takes hours to complete.
This Rocky Road Candy recipe is one of those no-bake classics: It couldn’t be easier (you don’t even need a candy thermometer), and it is a big hit every time!

In fact, with only 4 ingredients, I always feel guilty when friends and family gush over this dessert that took me less than 10 minutes to make. Waiting an hour for the Rocky Road to cool takes way more effort than creating it.
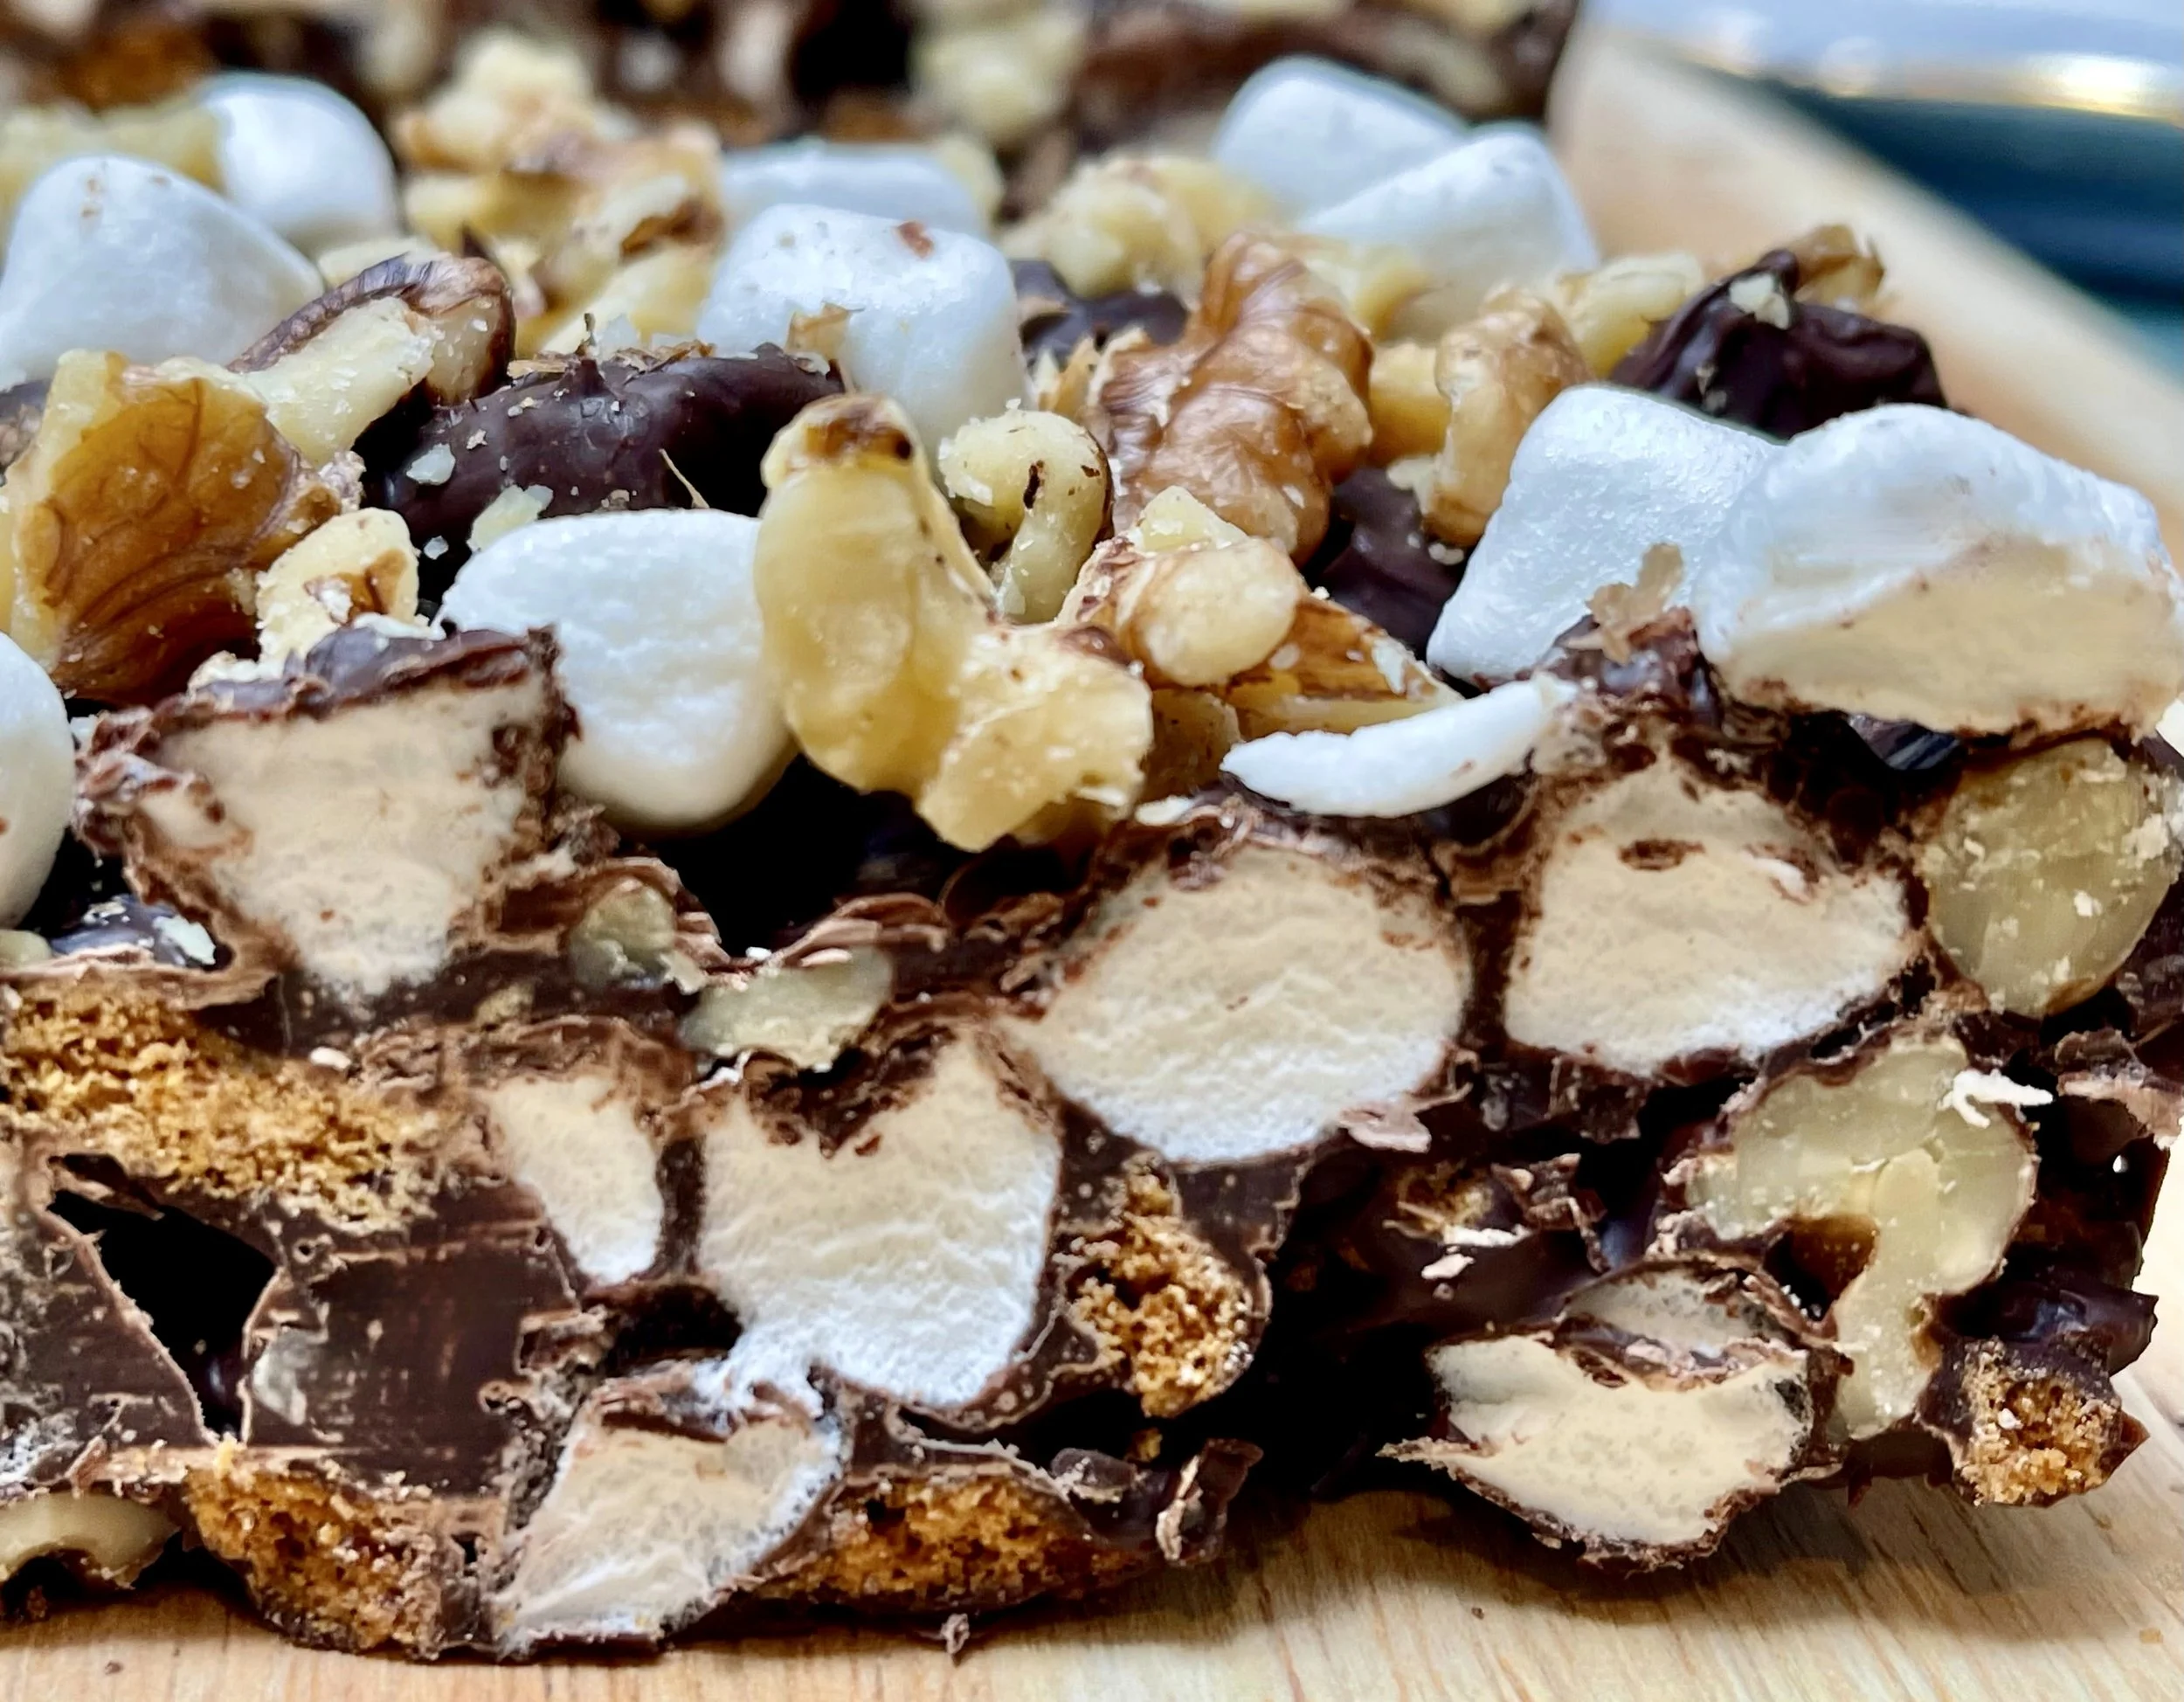
Why does everyone love this candy? It’s the ultimate texture and taste experience: creamy chocolate melted around fluffy marshmallows, crunchy nuts, and crisp cookie bits. It hits so many cravings at once! I don’t even like Rocky Road ice cream, yet I love these Rocky Road candy bars!
Whether you’re looking for a quick holiday gift, a contribution to a potluck, or just a sweet treat to keep in the fridge for “emergencies,” this recipe delivers.
Ingredients and Substitutions
The simple ingredients for this Rocky Road recipe are all at your local grocery store. Here’s what you need to know about selecting them and substituting if necessary.
Semi-Sweet Chocolate Mini Chips
I use semi-sweet chocolate chips for this recipe because they provide a rich cocoa flavor without being overly bitter or cloyingly sweet. The “mini” aspect of the chips helps them melt faster and more evenly.
Substitutions: Milk chocolate is more traditional, but be warned: It will make the final candy very sweet. On the flip side, you can use dark chocolate chips for a healthier, less sweet version.
If you only have standard-sized chips, chocolate melts, or bars, just chop them up a bit before melting.
Mini Marshmallows
These provide the signature “rocky” look and the soft, chewy texture that contrasts with the nuts.
Substitutions: If you can’t find miniature marshmallows, you can chop large ones into quarters using kitchen shears dusted with powdered sugar (to prevent sticking). For a fun twist, colored fruity marshmallows can add a holiday or retro vibe.
Walnut Halves & Pieces
Walnuts bring an earthy, slightly bitter crunch that cuts through the sugar. They are a classic choice for Rocky Road.
Substitutions: Roasted almonds, pecans, or macadamia nuts are excellent alternatives. If you have a nut allergy, you can replace the nuts with seeds like pumpkin seeds (pepitas) or simply add crushed pretzels or dried fruit for texture.
Biscoff Cookies
This is the secret weapon of this recipe. Biscoff cookies (speculoos) have a unique caramelized spice flavor (cinnamon, nutmeg, ginger) that makes the chocolate taste even better.
Substitutions: If you can’t find Biscoff, graham crackers or digestive biscuits are a decent replacement. Shortbread cookies also work well if you want a more buttery, crumbly texture.
Rocky Road Candy Recipe
This recipe is straightforward, but working quickly once the chocolate is melted is key. Have all your mix-ins prepped and ready to go before you start melting anything.
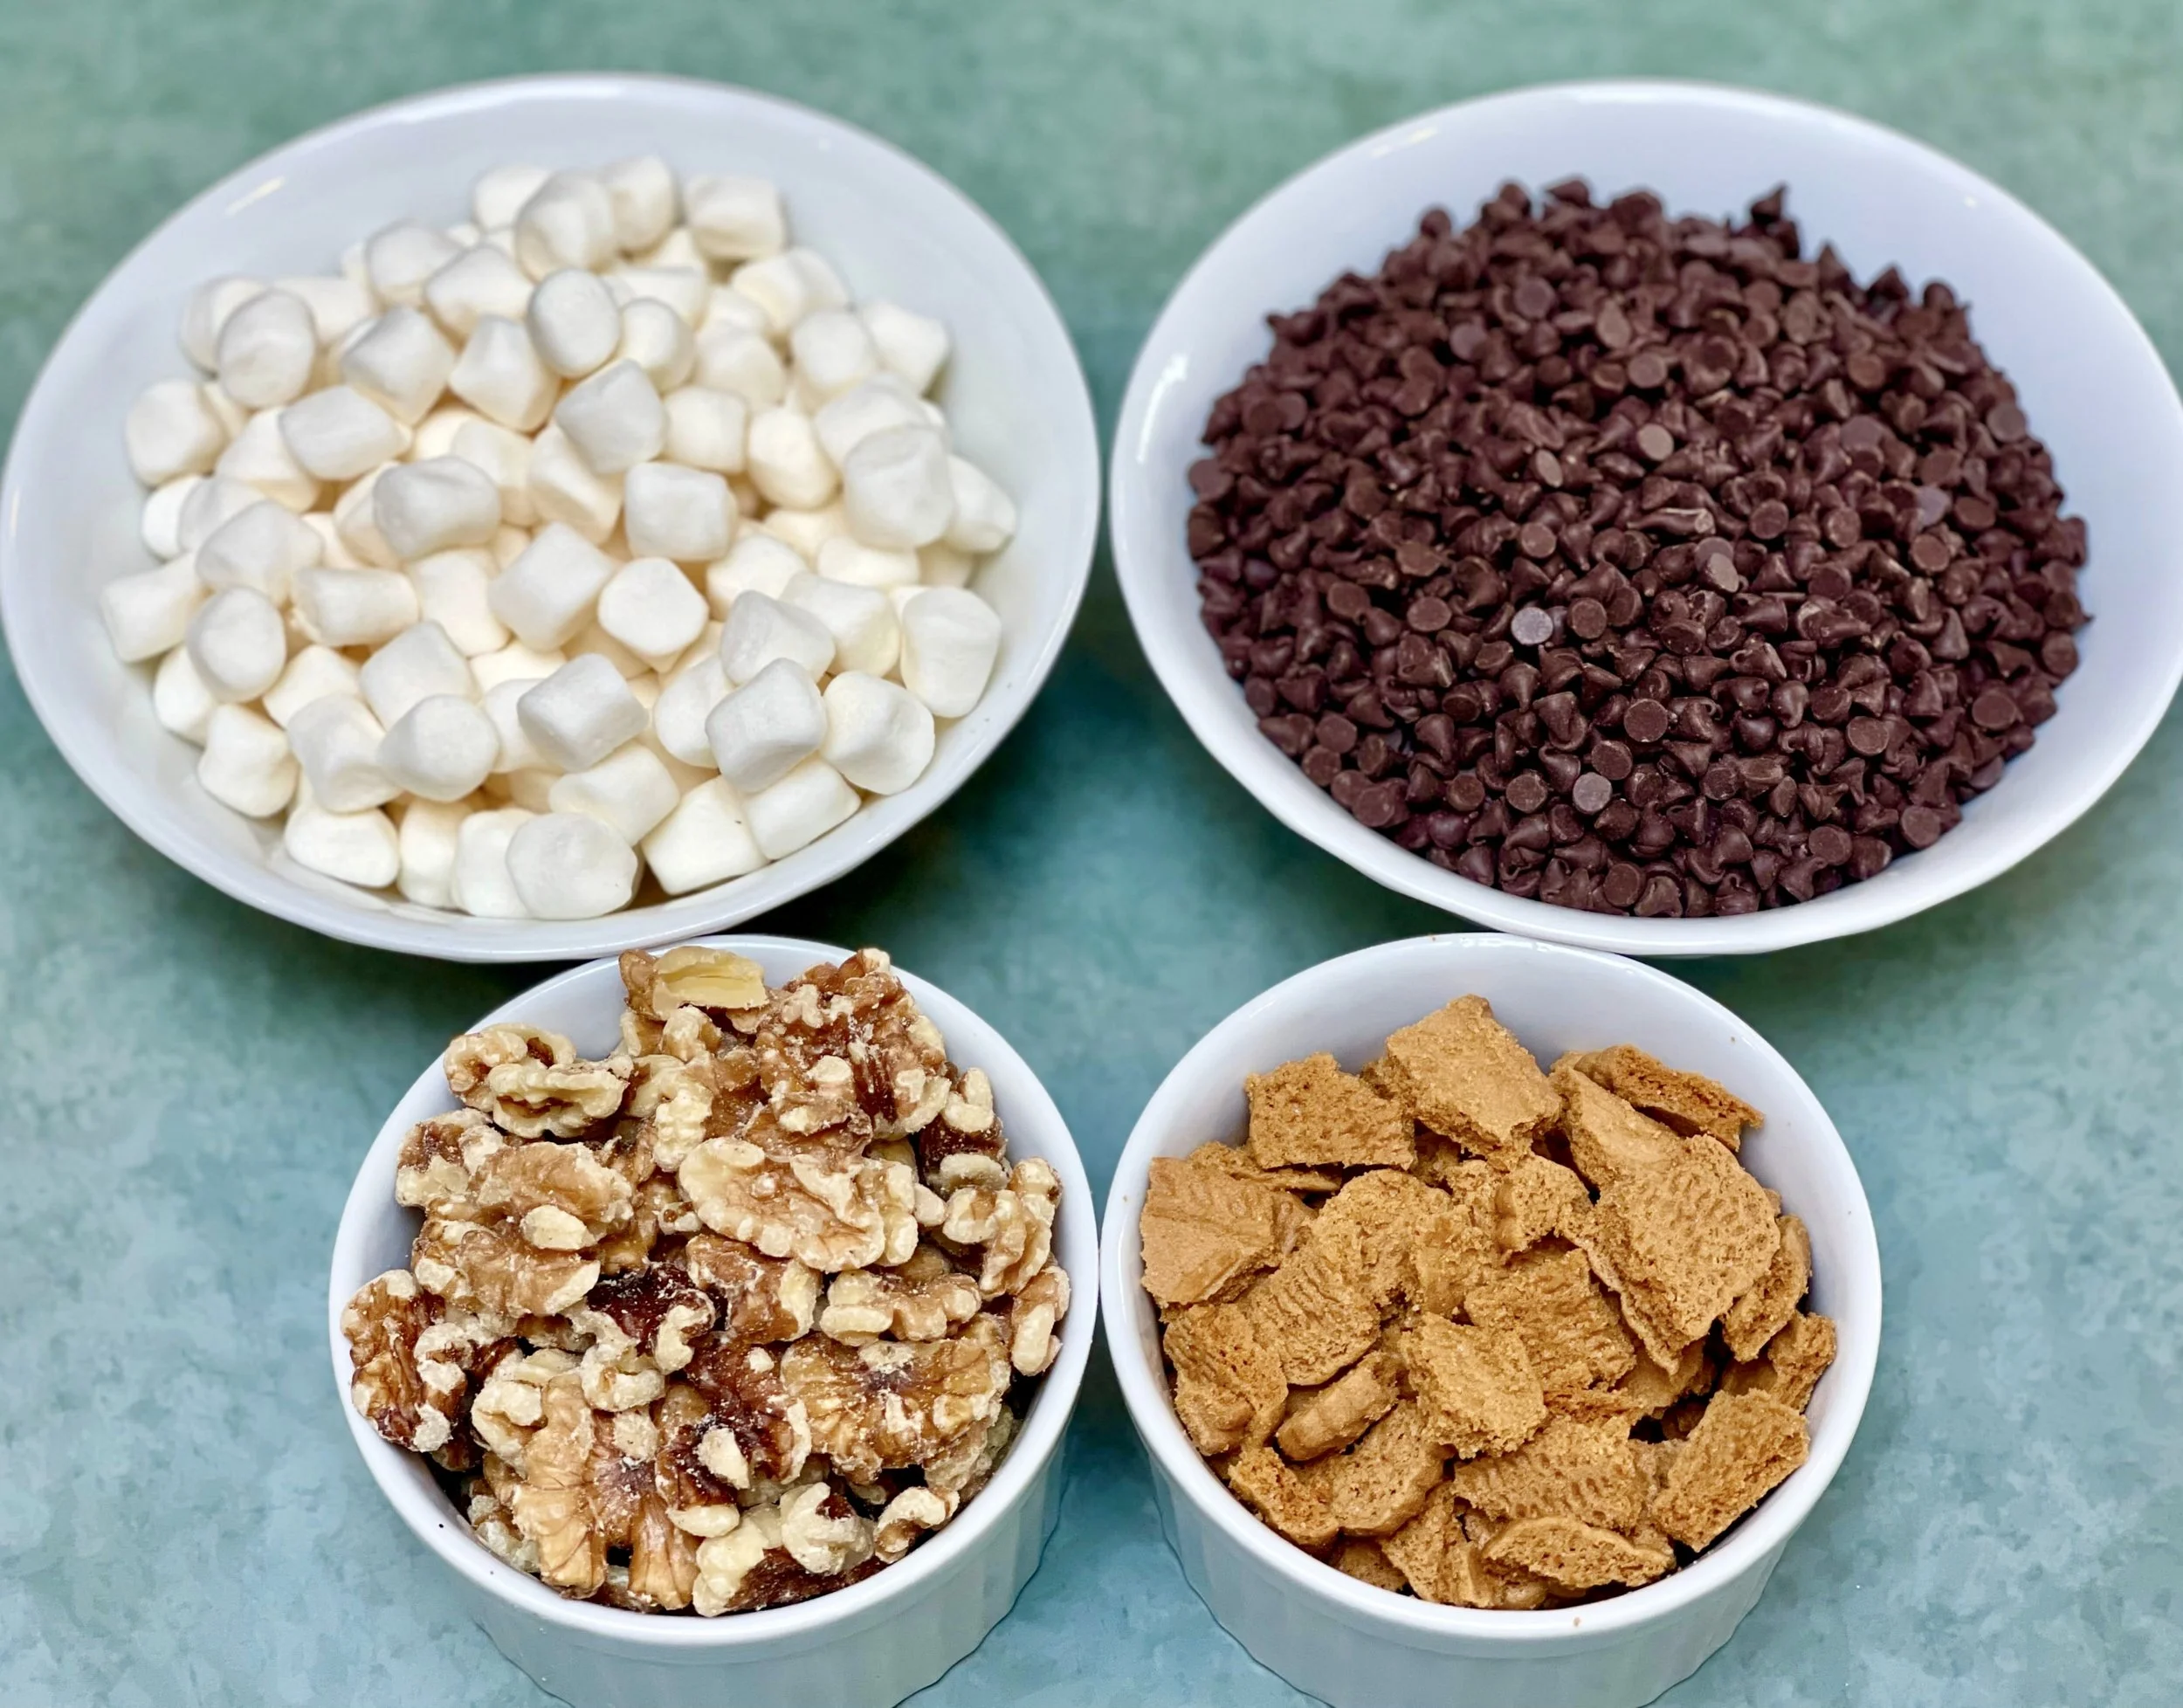
Ingredients
2 cups mini marshmallows
1½ cups walnut halves and pieces
8 Biscoff cookies
1 package (12 oz) semi-sweet chocolate mini chips
Instructions
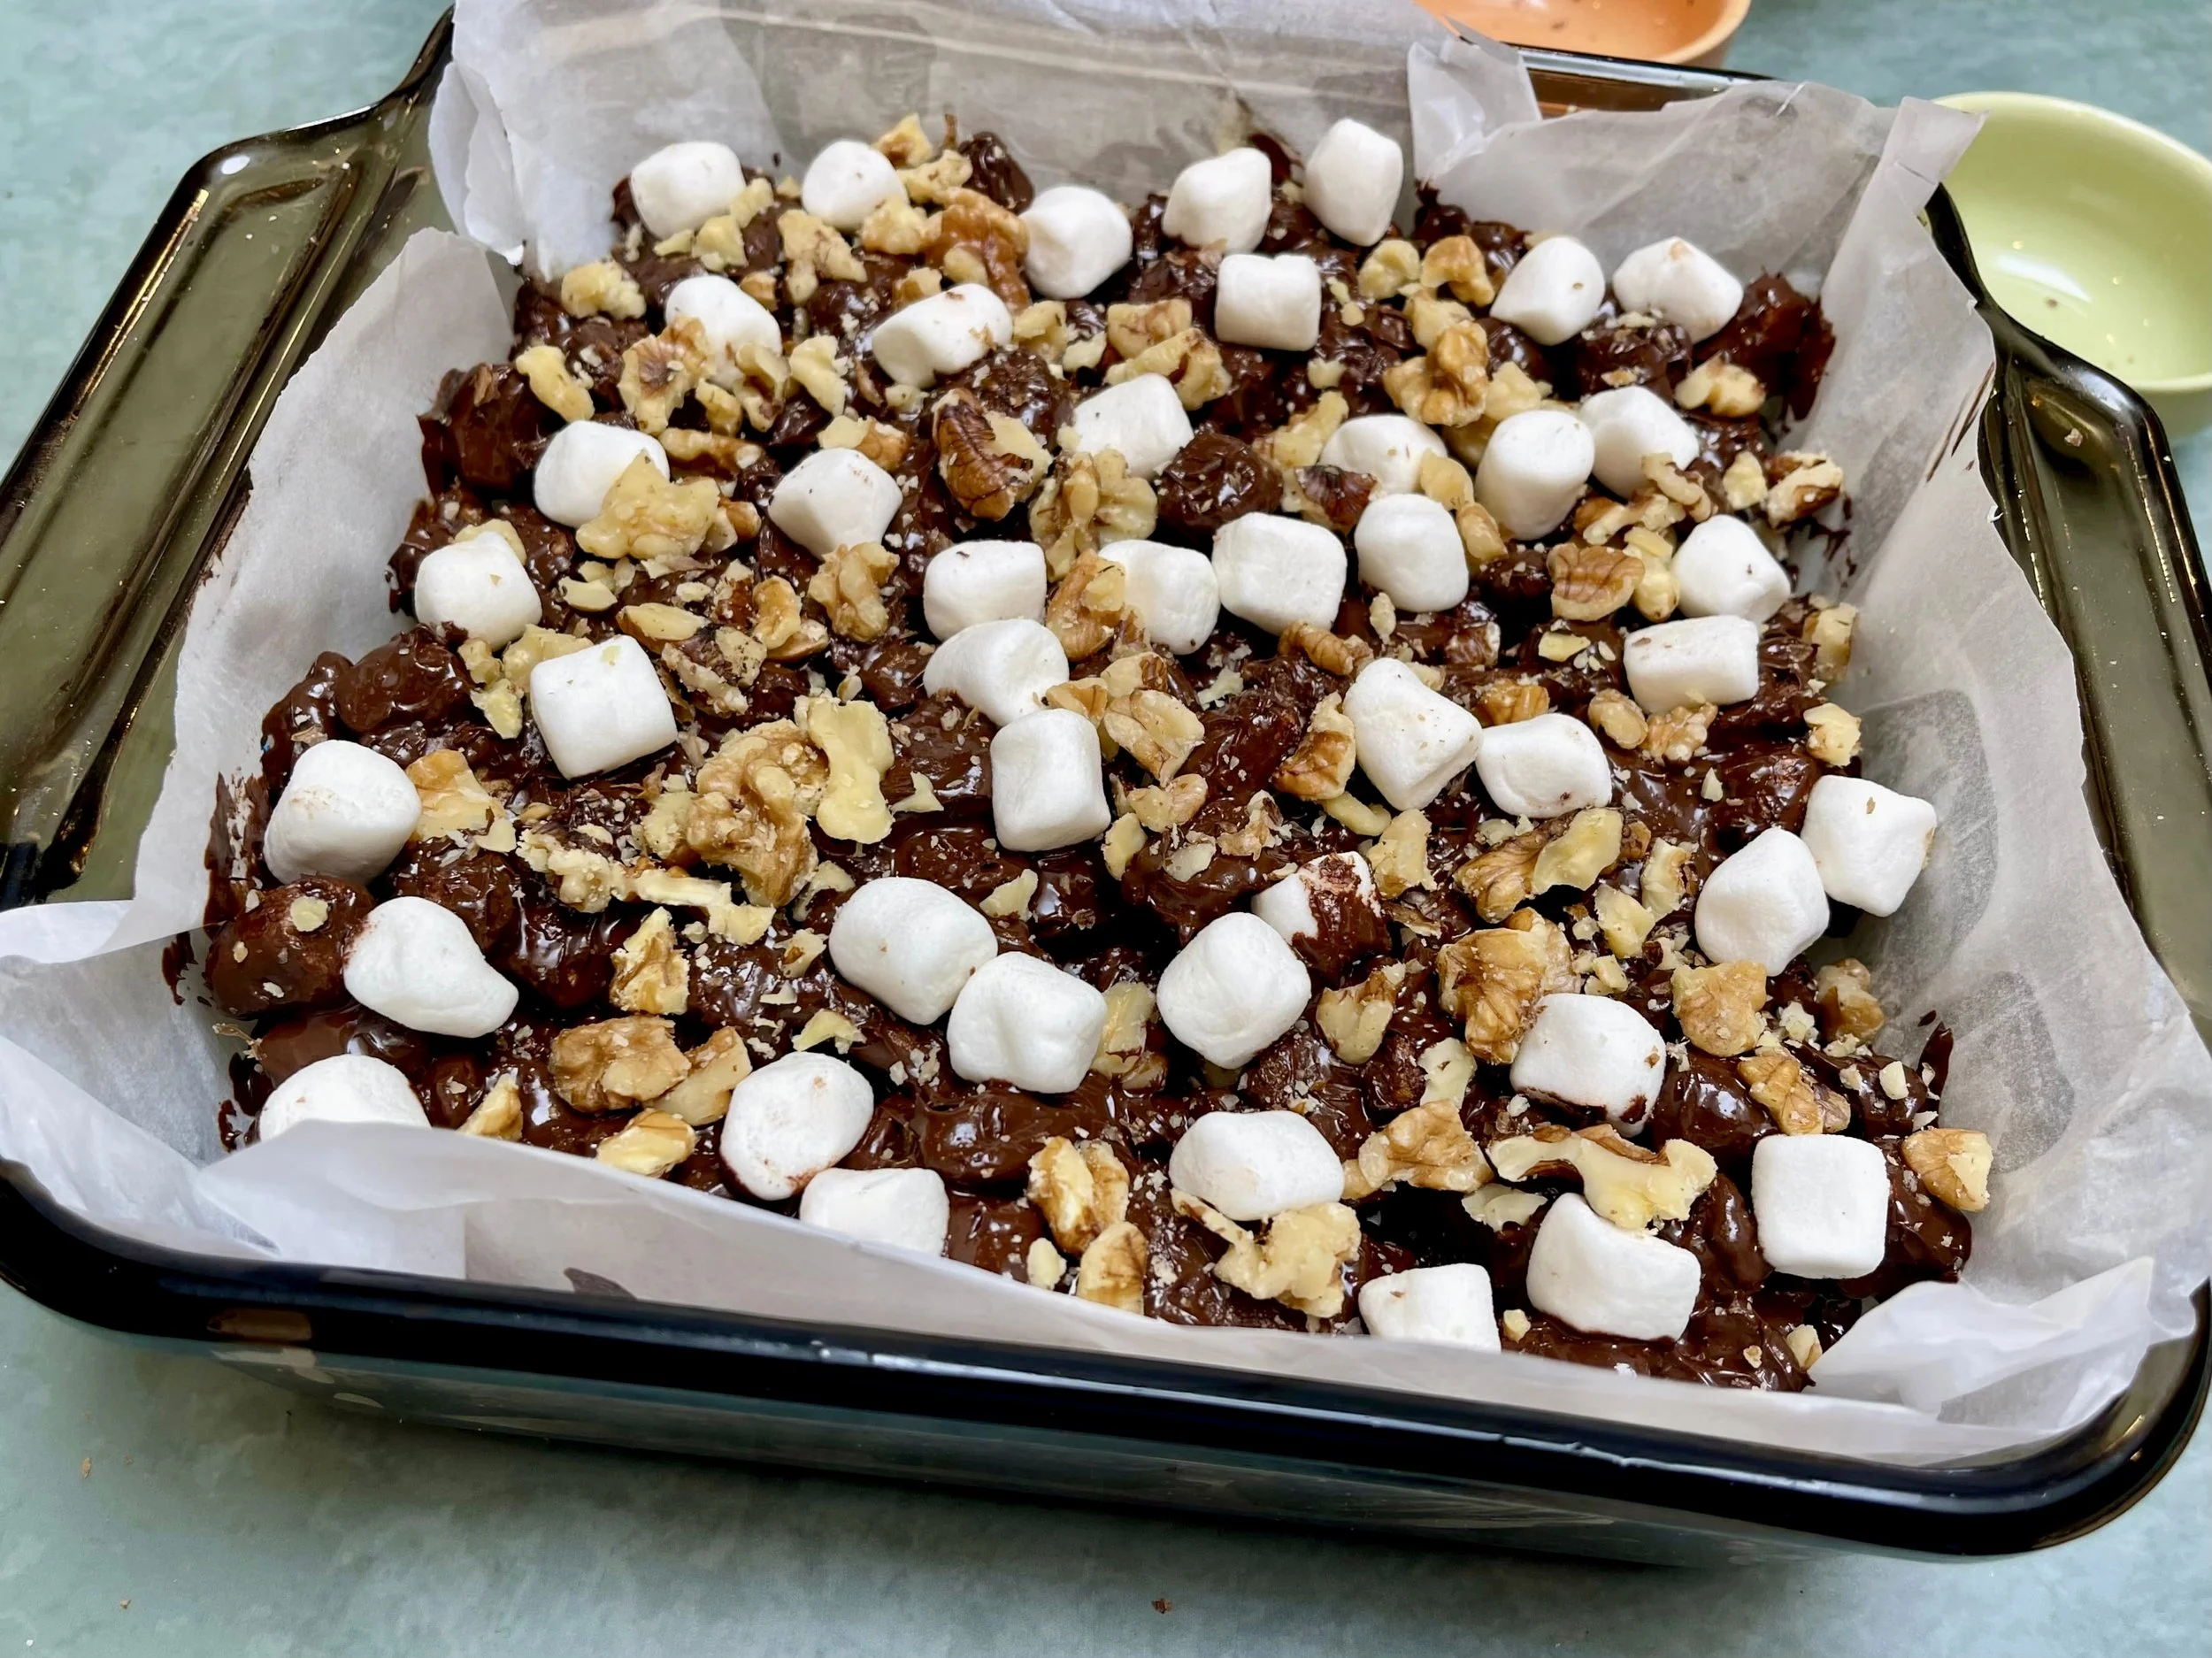
1. Prep your topping and pan. Before you begin melting anything, line an 8x8- or 9x9-inch square baking pan with parchment paper. Leave some overhang on the sides so you can easily lift the candy out later.
Next, measure out your topping ingredients. Take your marshmallows and walnuts and set aside ¼ cup of each specifically for the topping. This ensures your finished candy looks as good as it tastes, with plenty of visible texture on top.

2. Break the cookies. Take your 8 Biscoff cookies and break them into bite-sized chunks. You want them small enough to mix in easily, but large enough that they don’t turn into crumbs. Aim for pieces about the size of a dime or nickel.
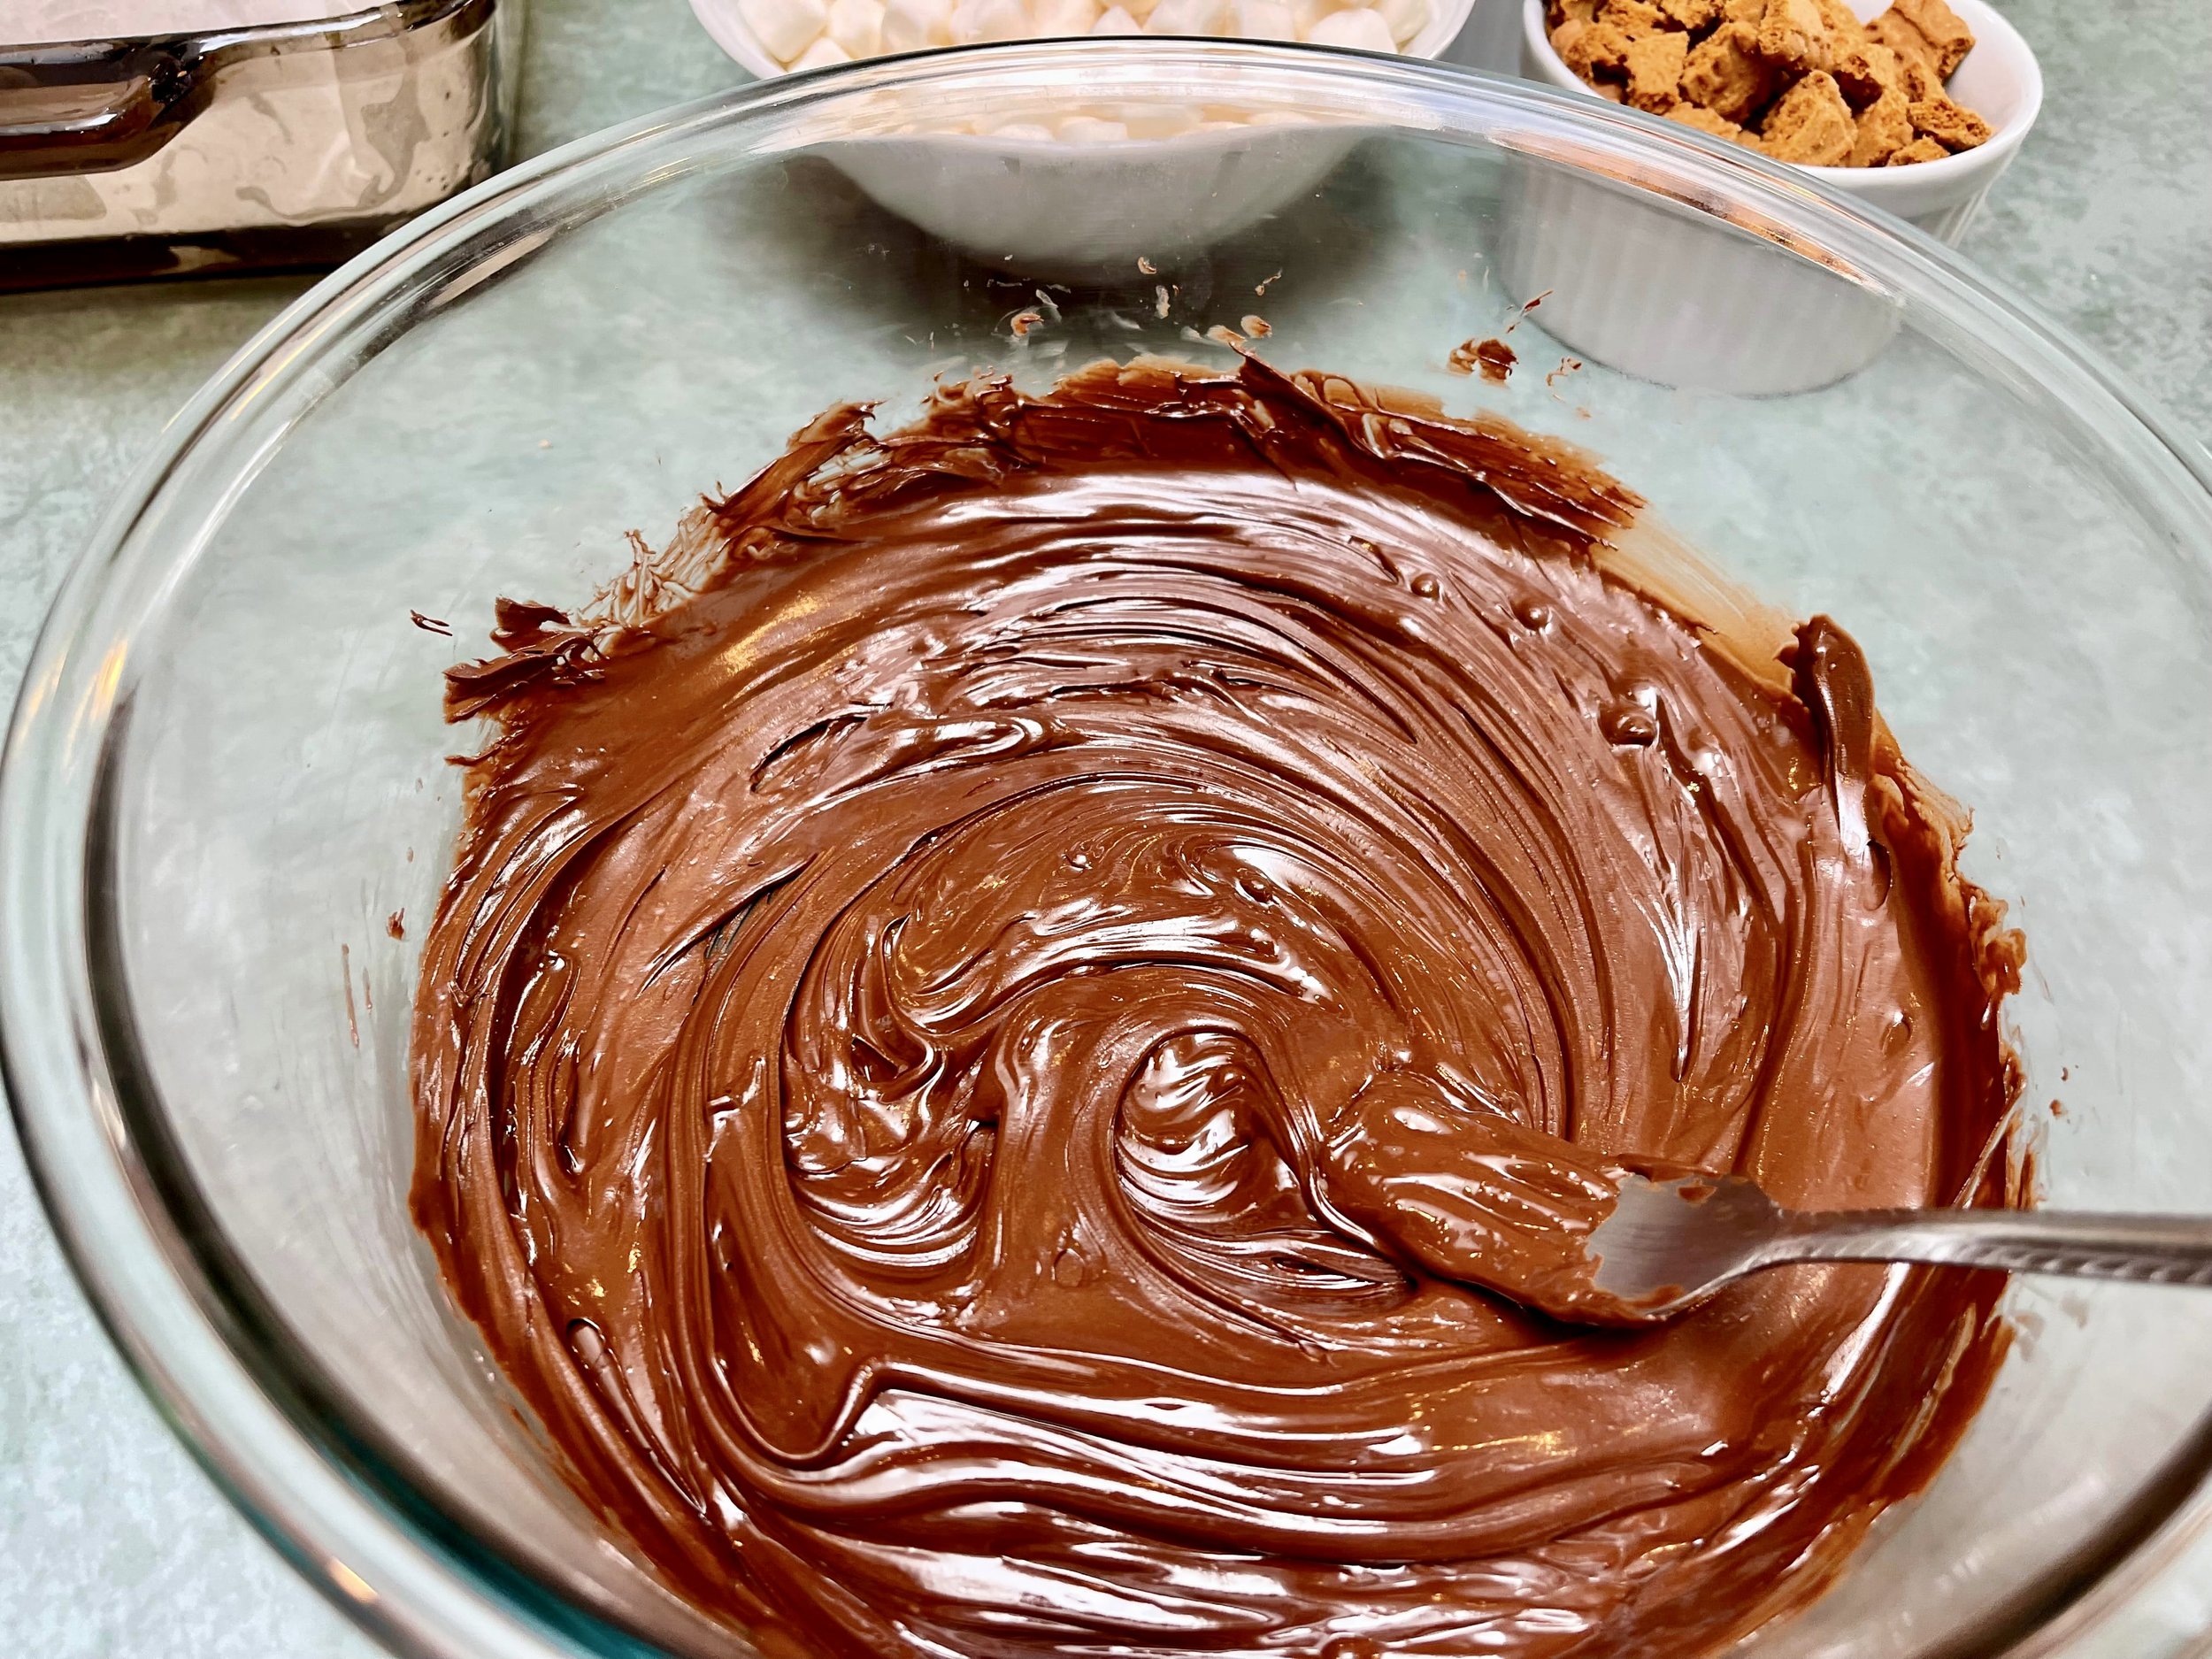
3. Melt the chocolate. Place the semi-sweet chocolate mini chips in a large microwave-safe bowl. Microwave in 30-second intervals, stirring the melted chocolate vigorously between each interval. Even if you can’t tell whether your chocolate is melted, stir.
It usually takes me about 3–4 rounds. Stop when the chocolate is mostly melted but still has a few small lumps; the residual heat will melt the rest as you stir.
Note: You can also use a double boiler on the stove if you prefer, making sure the water doesn’t touch the bottom of the bowl.
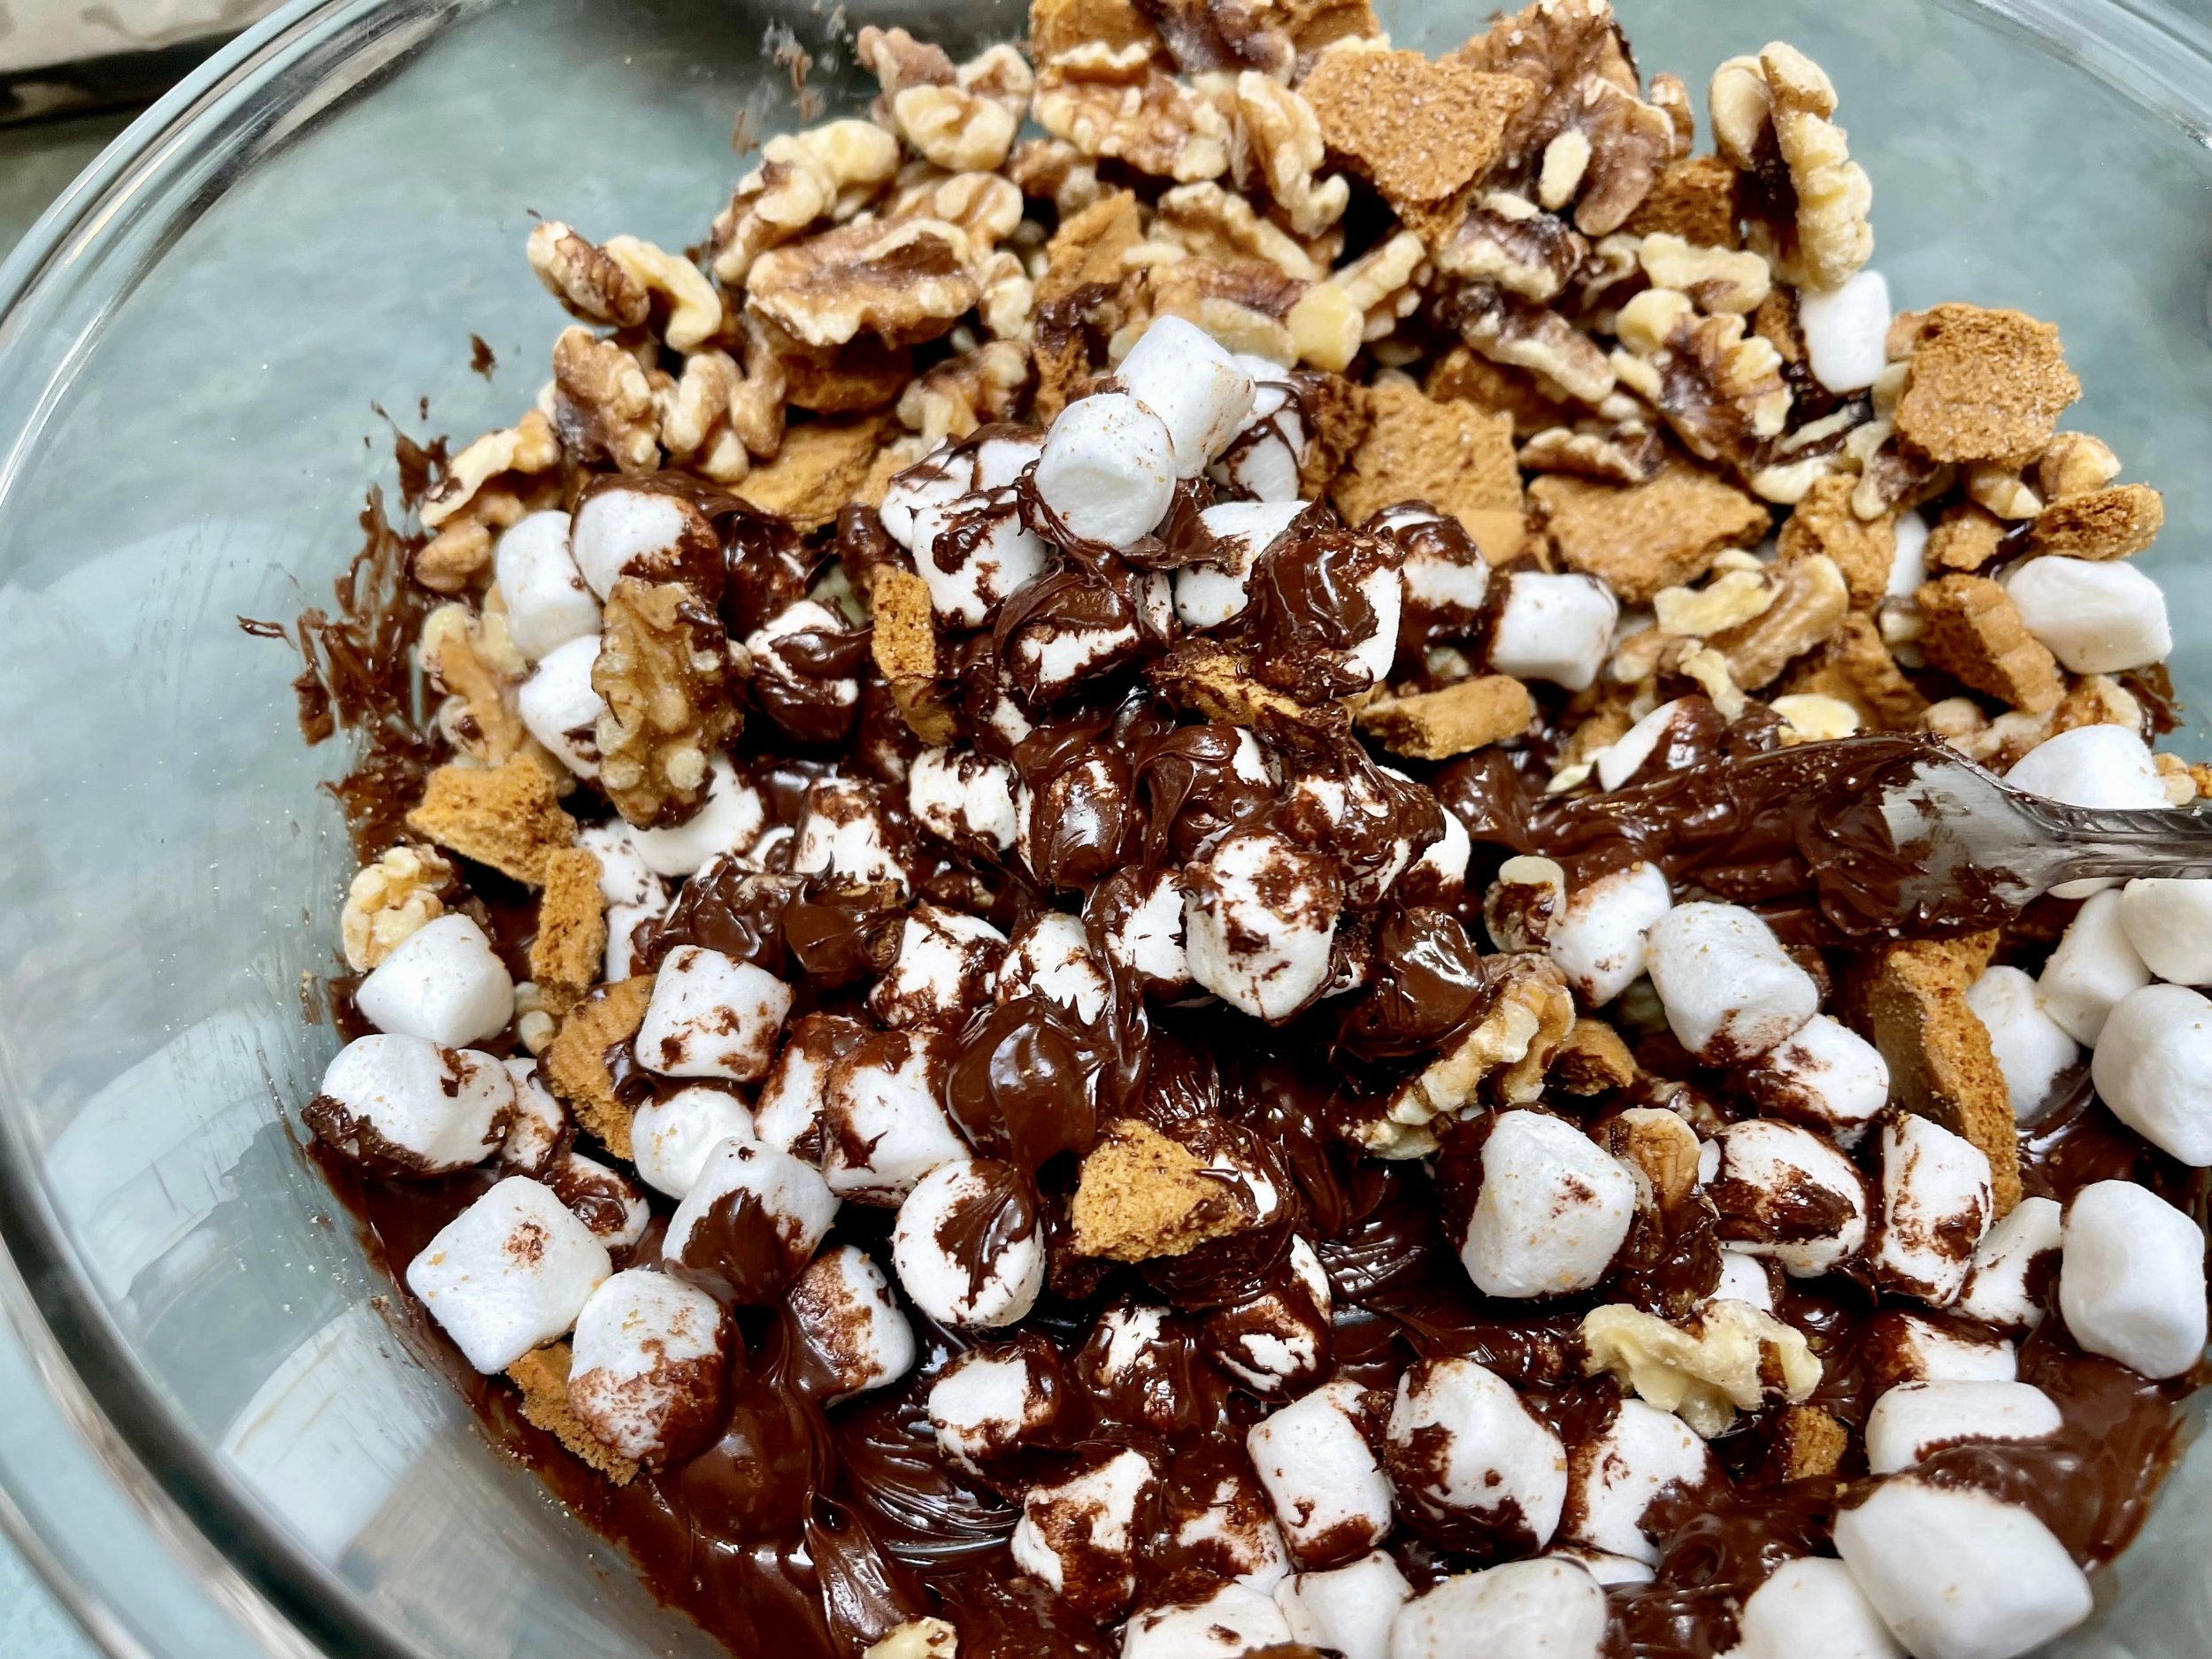
4. Combine the mix-ins. Once the chocolate is completely smooth, work quickly. Dump in the remaining 1¾ cups of marshmallows, the remaining 1¼ cups of walnuts, and the broken Biscoff cookie pieces. Fold everything together gently using a rubber spatula. Ensure every marshmallow and cookie piece is coated in chocolate.
5. Transfer to pan. Pour the chocolate mixture into your prepared baking pan. Use your spatula to spread it out into an even layer, pushing the mixture into the corners of the square pan.

6. Add the topping. Immediately sprinkle the reserved ¼ cup of marshmallows and ¼ cup of walnuts over the top of the wet chocolate. Press them down very slightly so they adhere to the chocolate but stay visible on the surface.
7. Chill and set. Place the pan in the refrigerator for at least 1 hour, or until the candy is completely firm. It can sit overnight in the fridge without any issues, if you’re looking to enjoy it the next day.
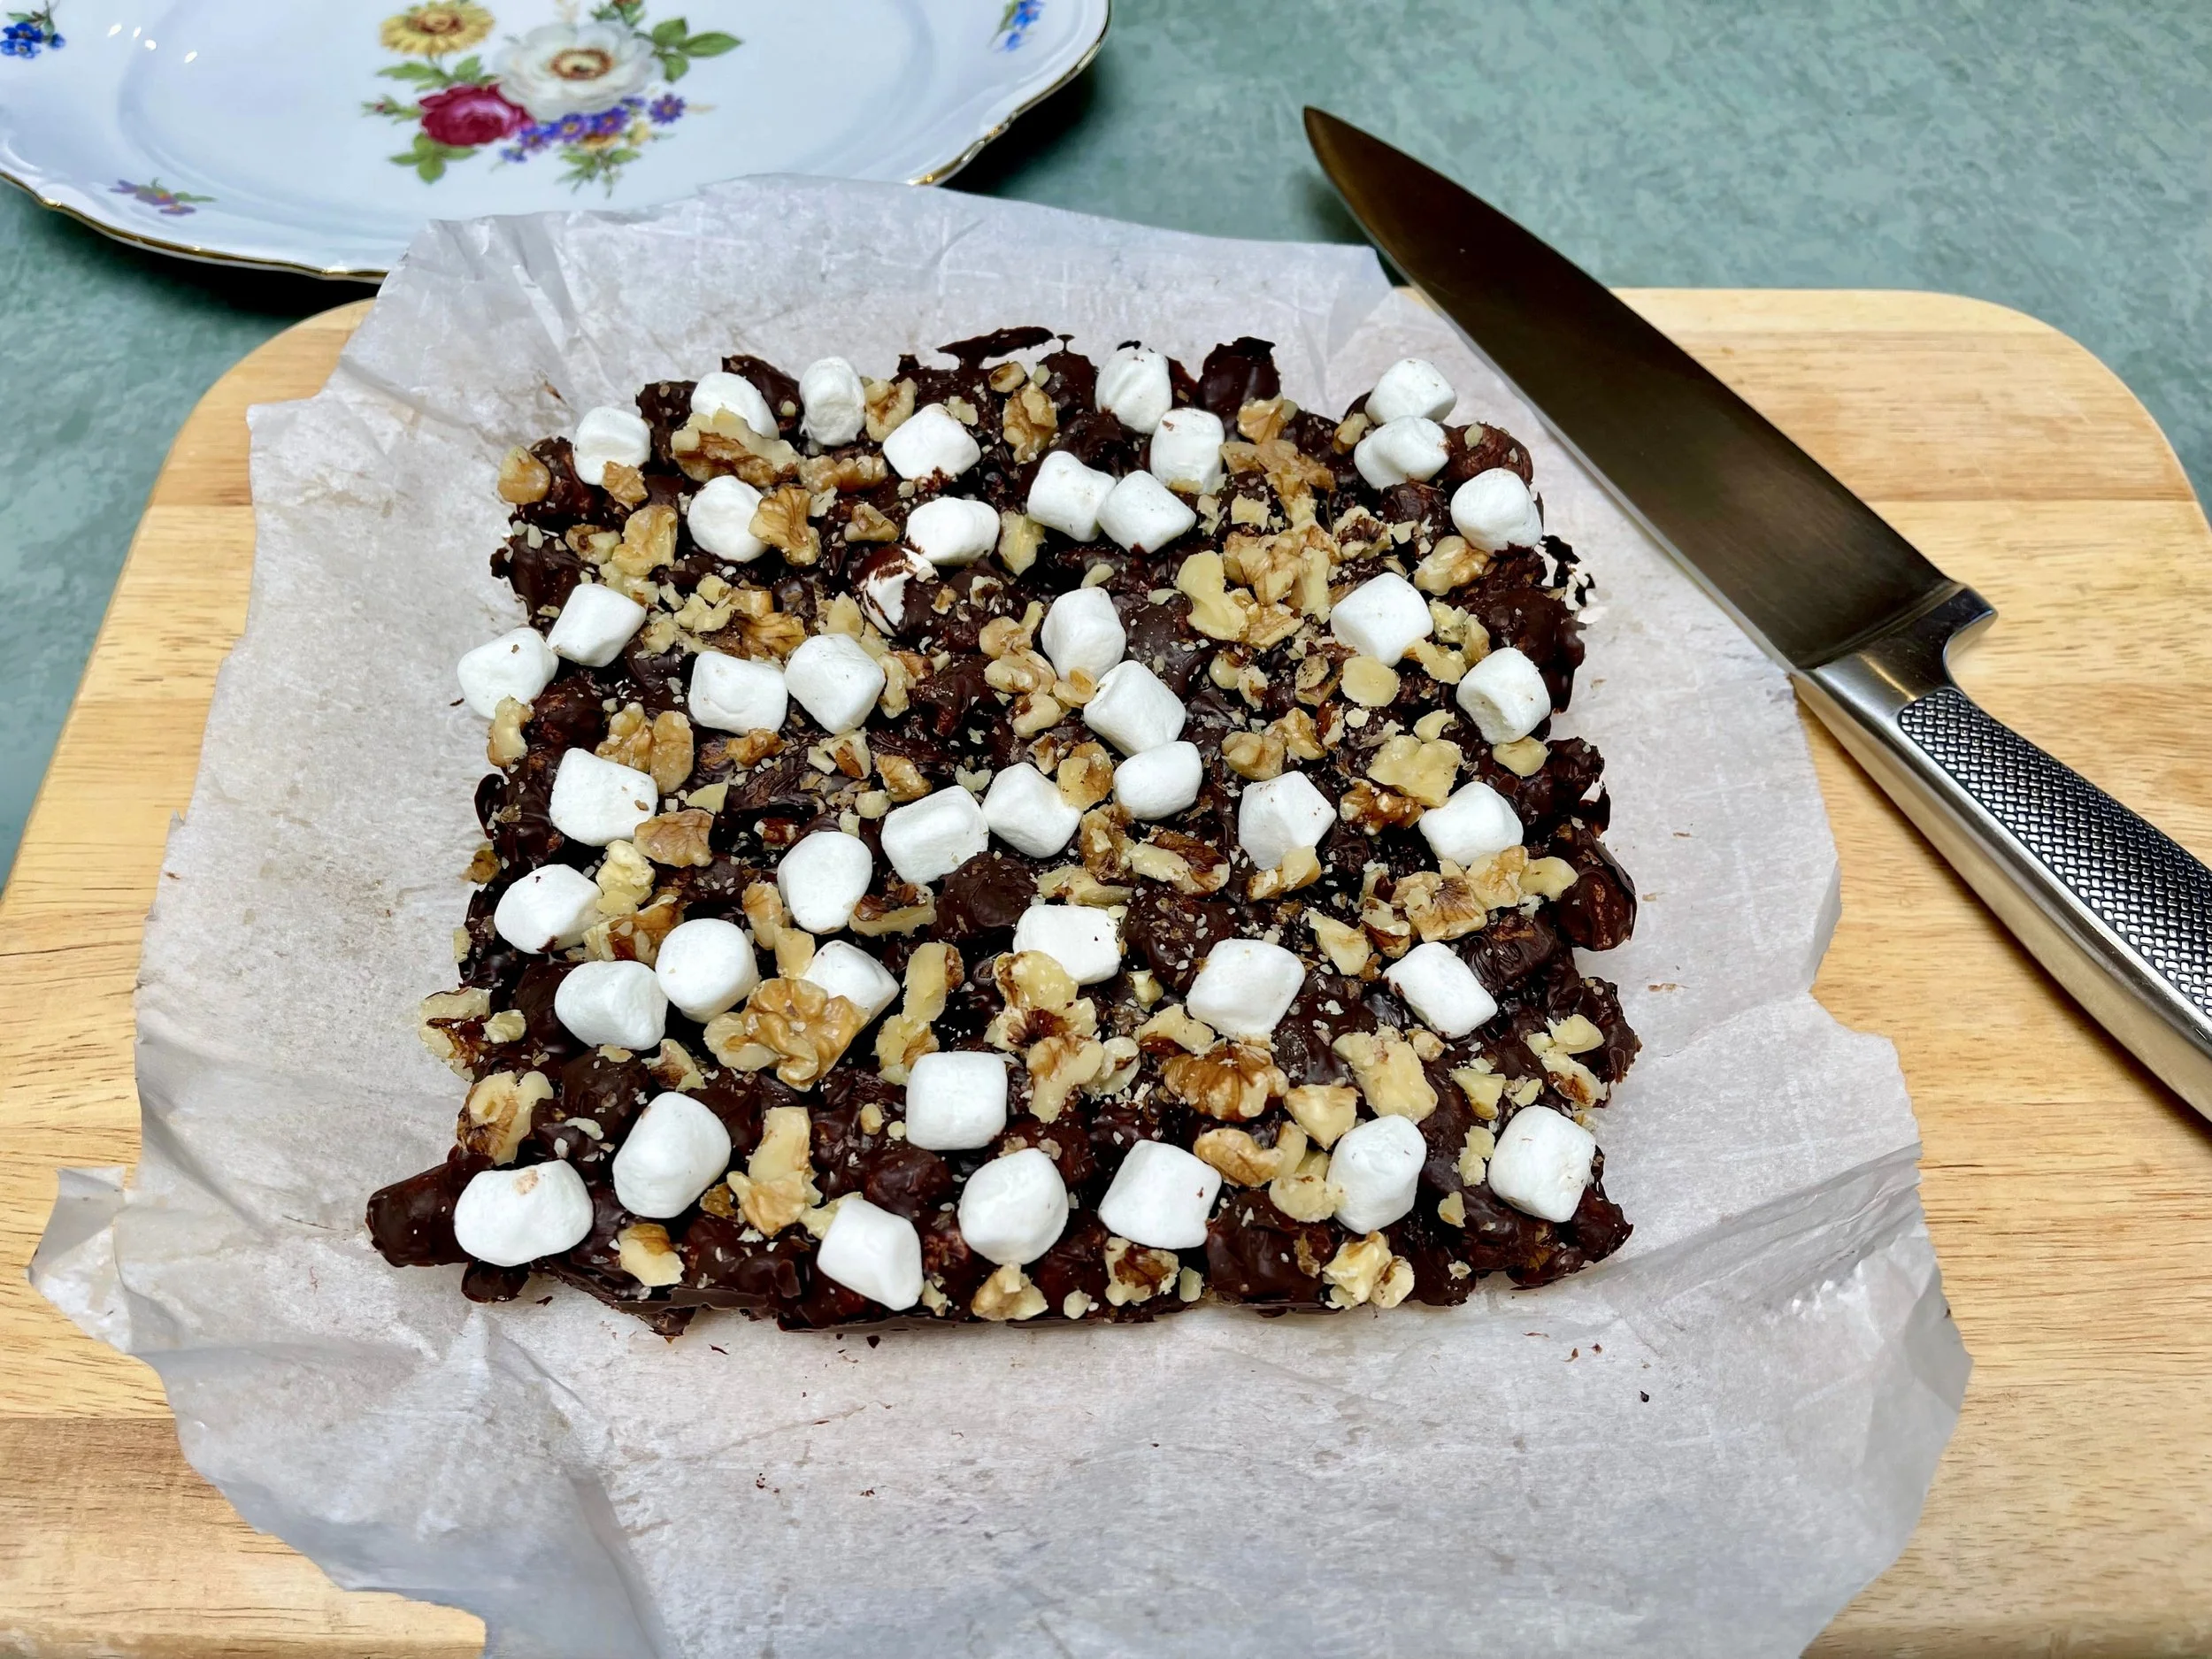
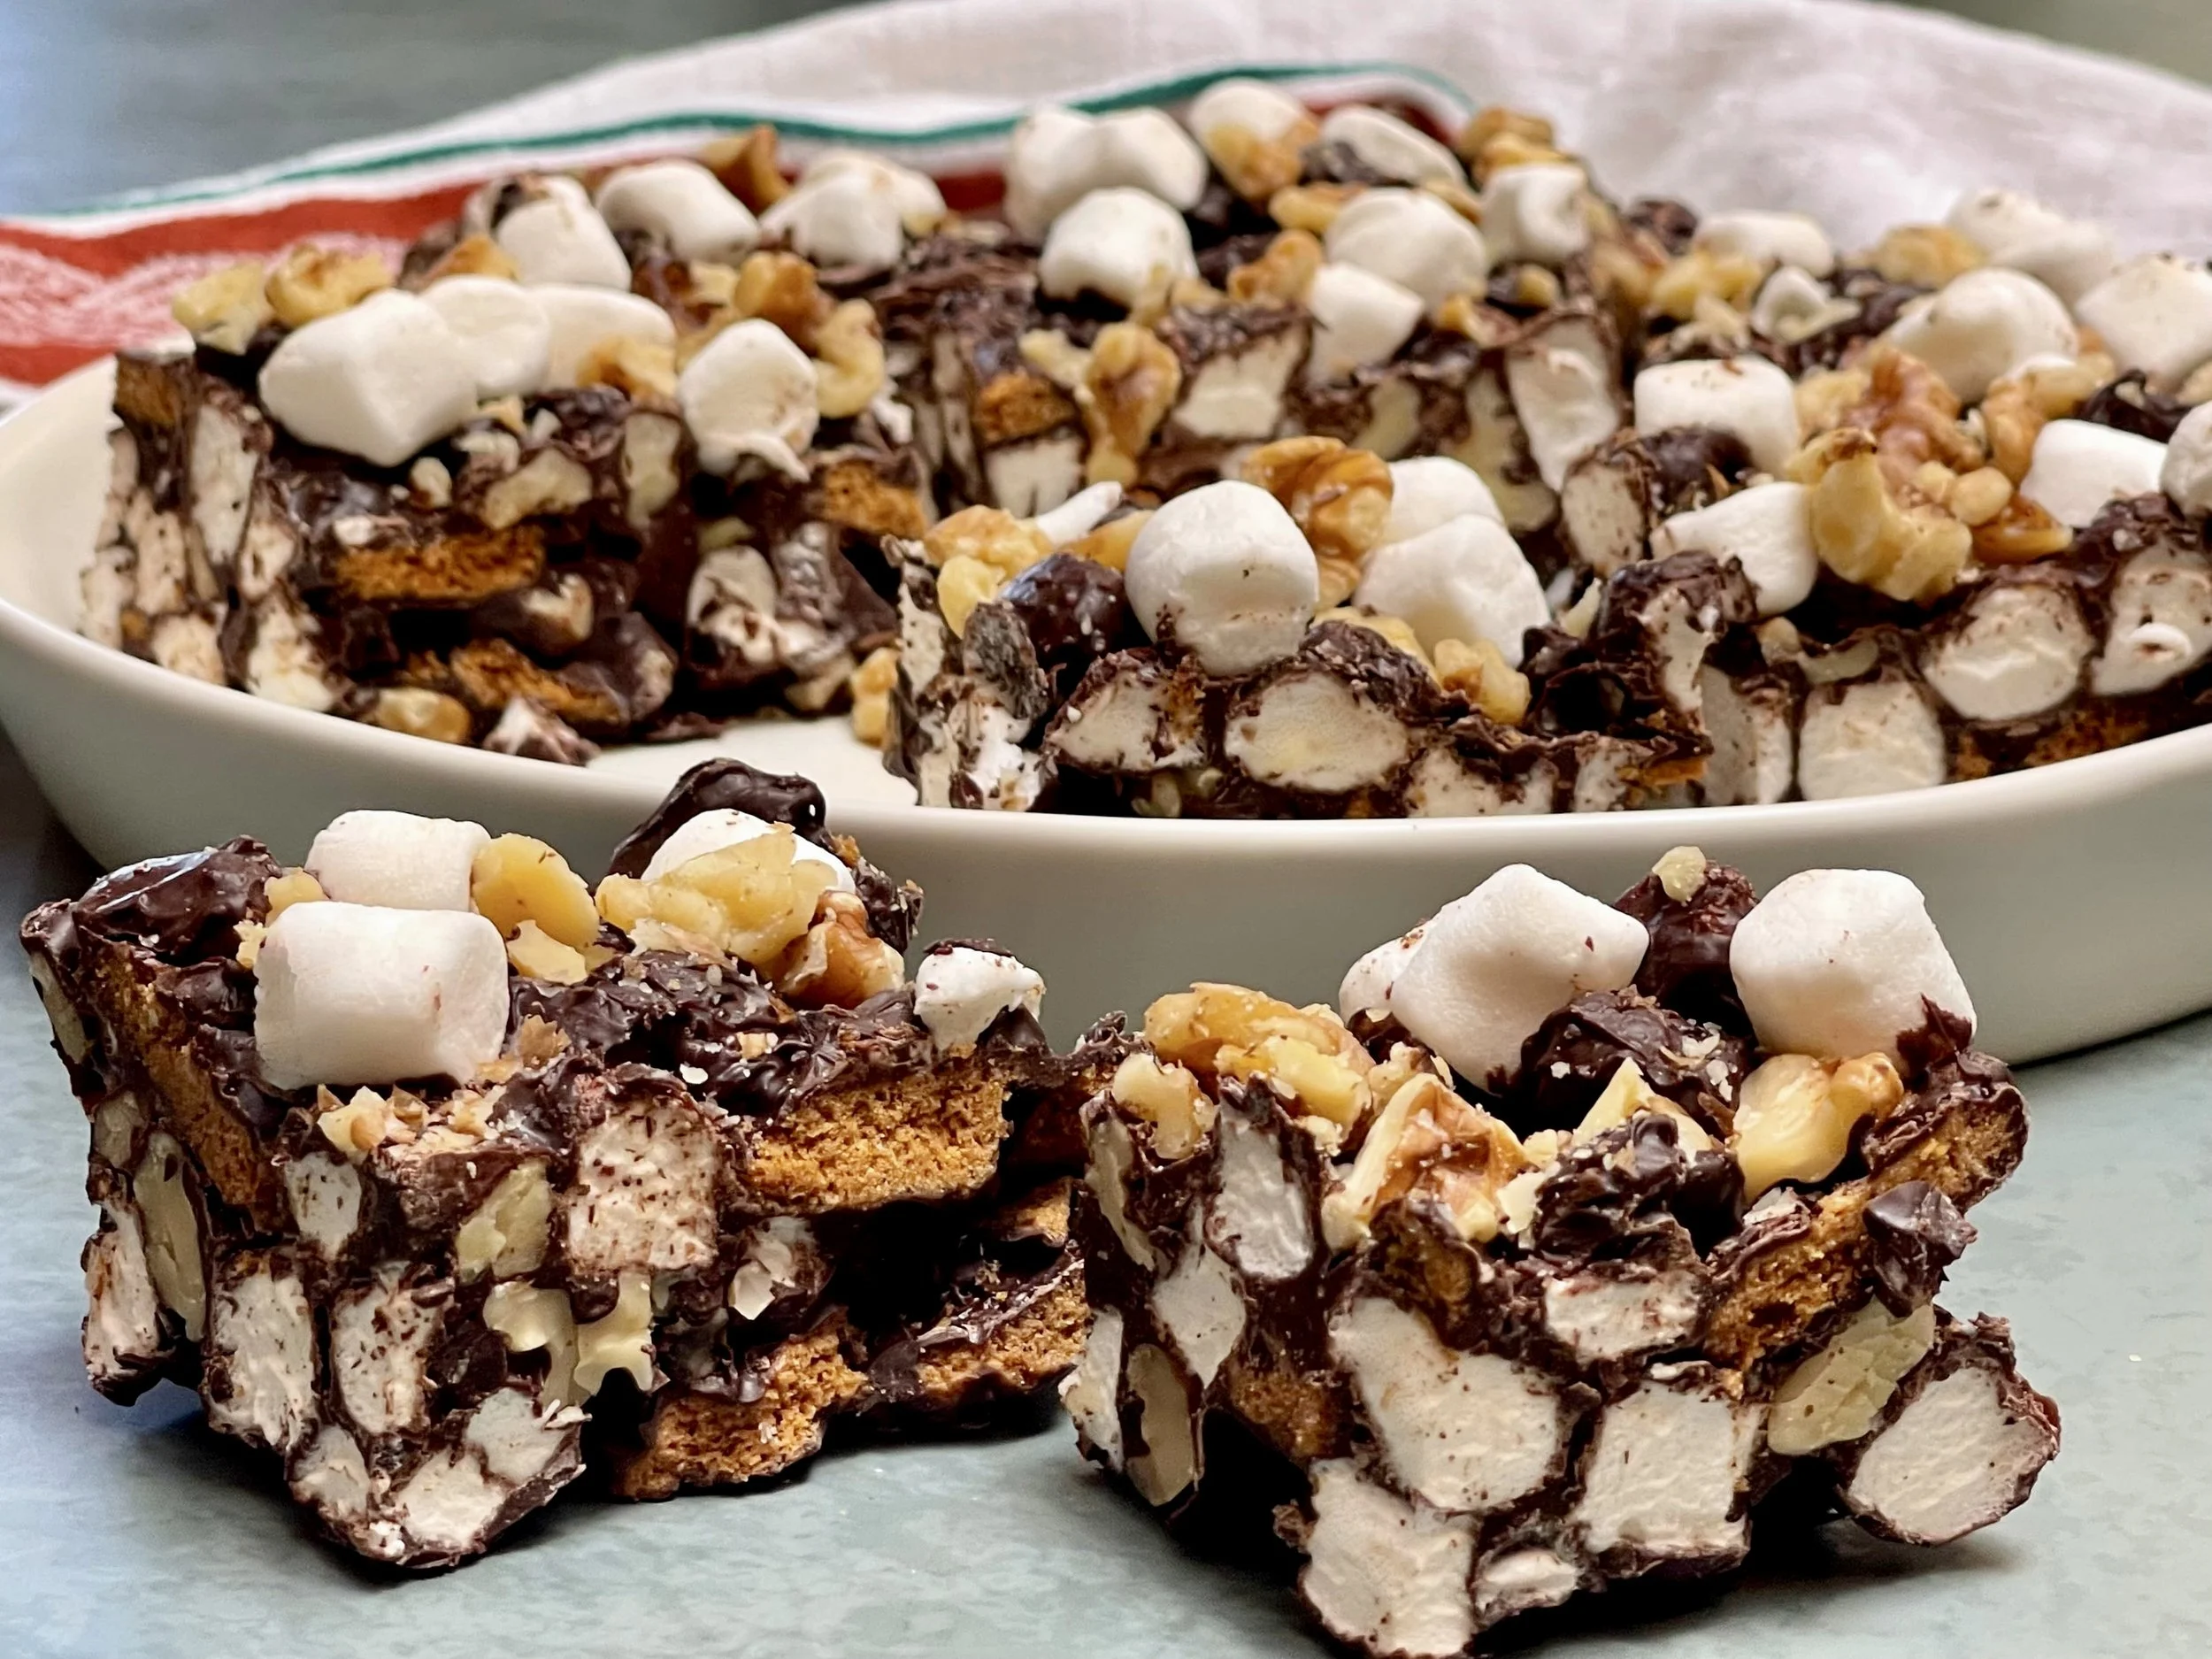
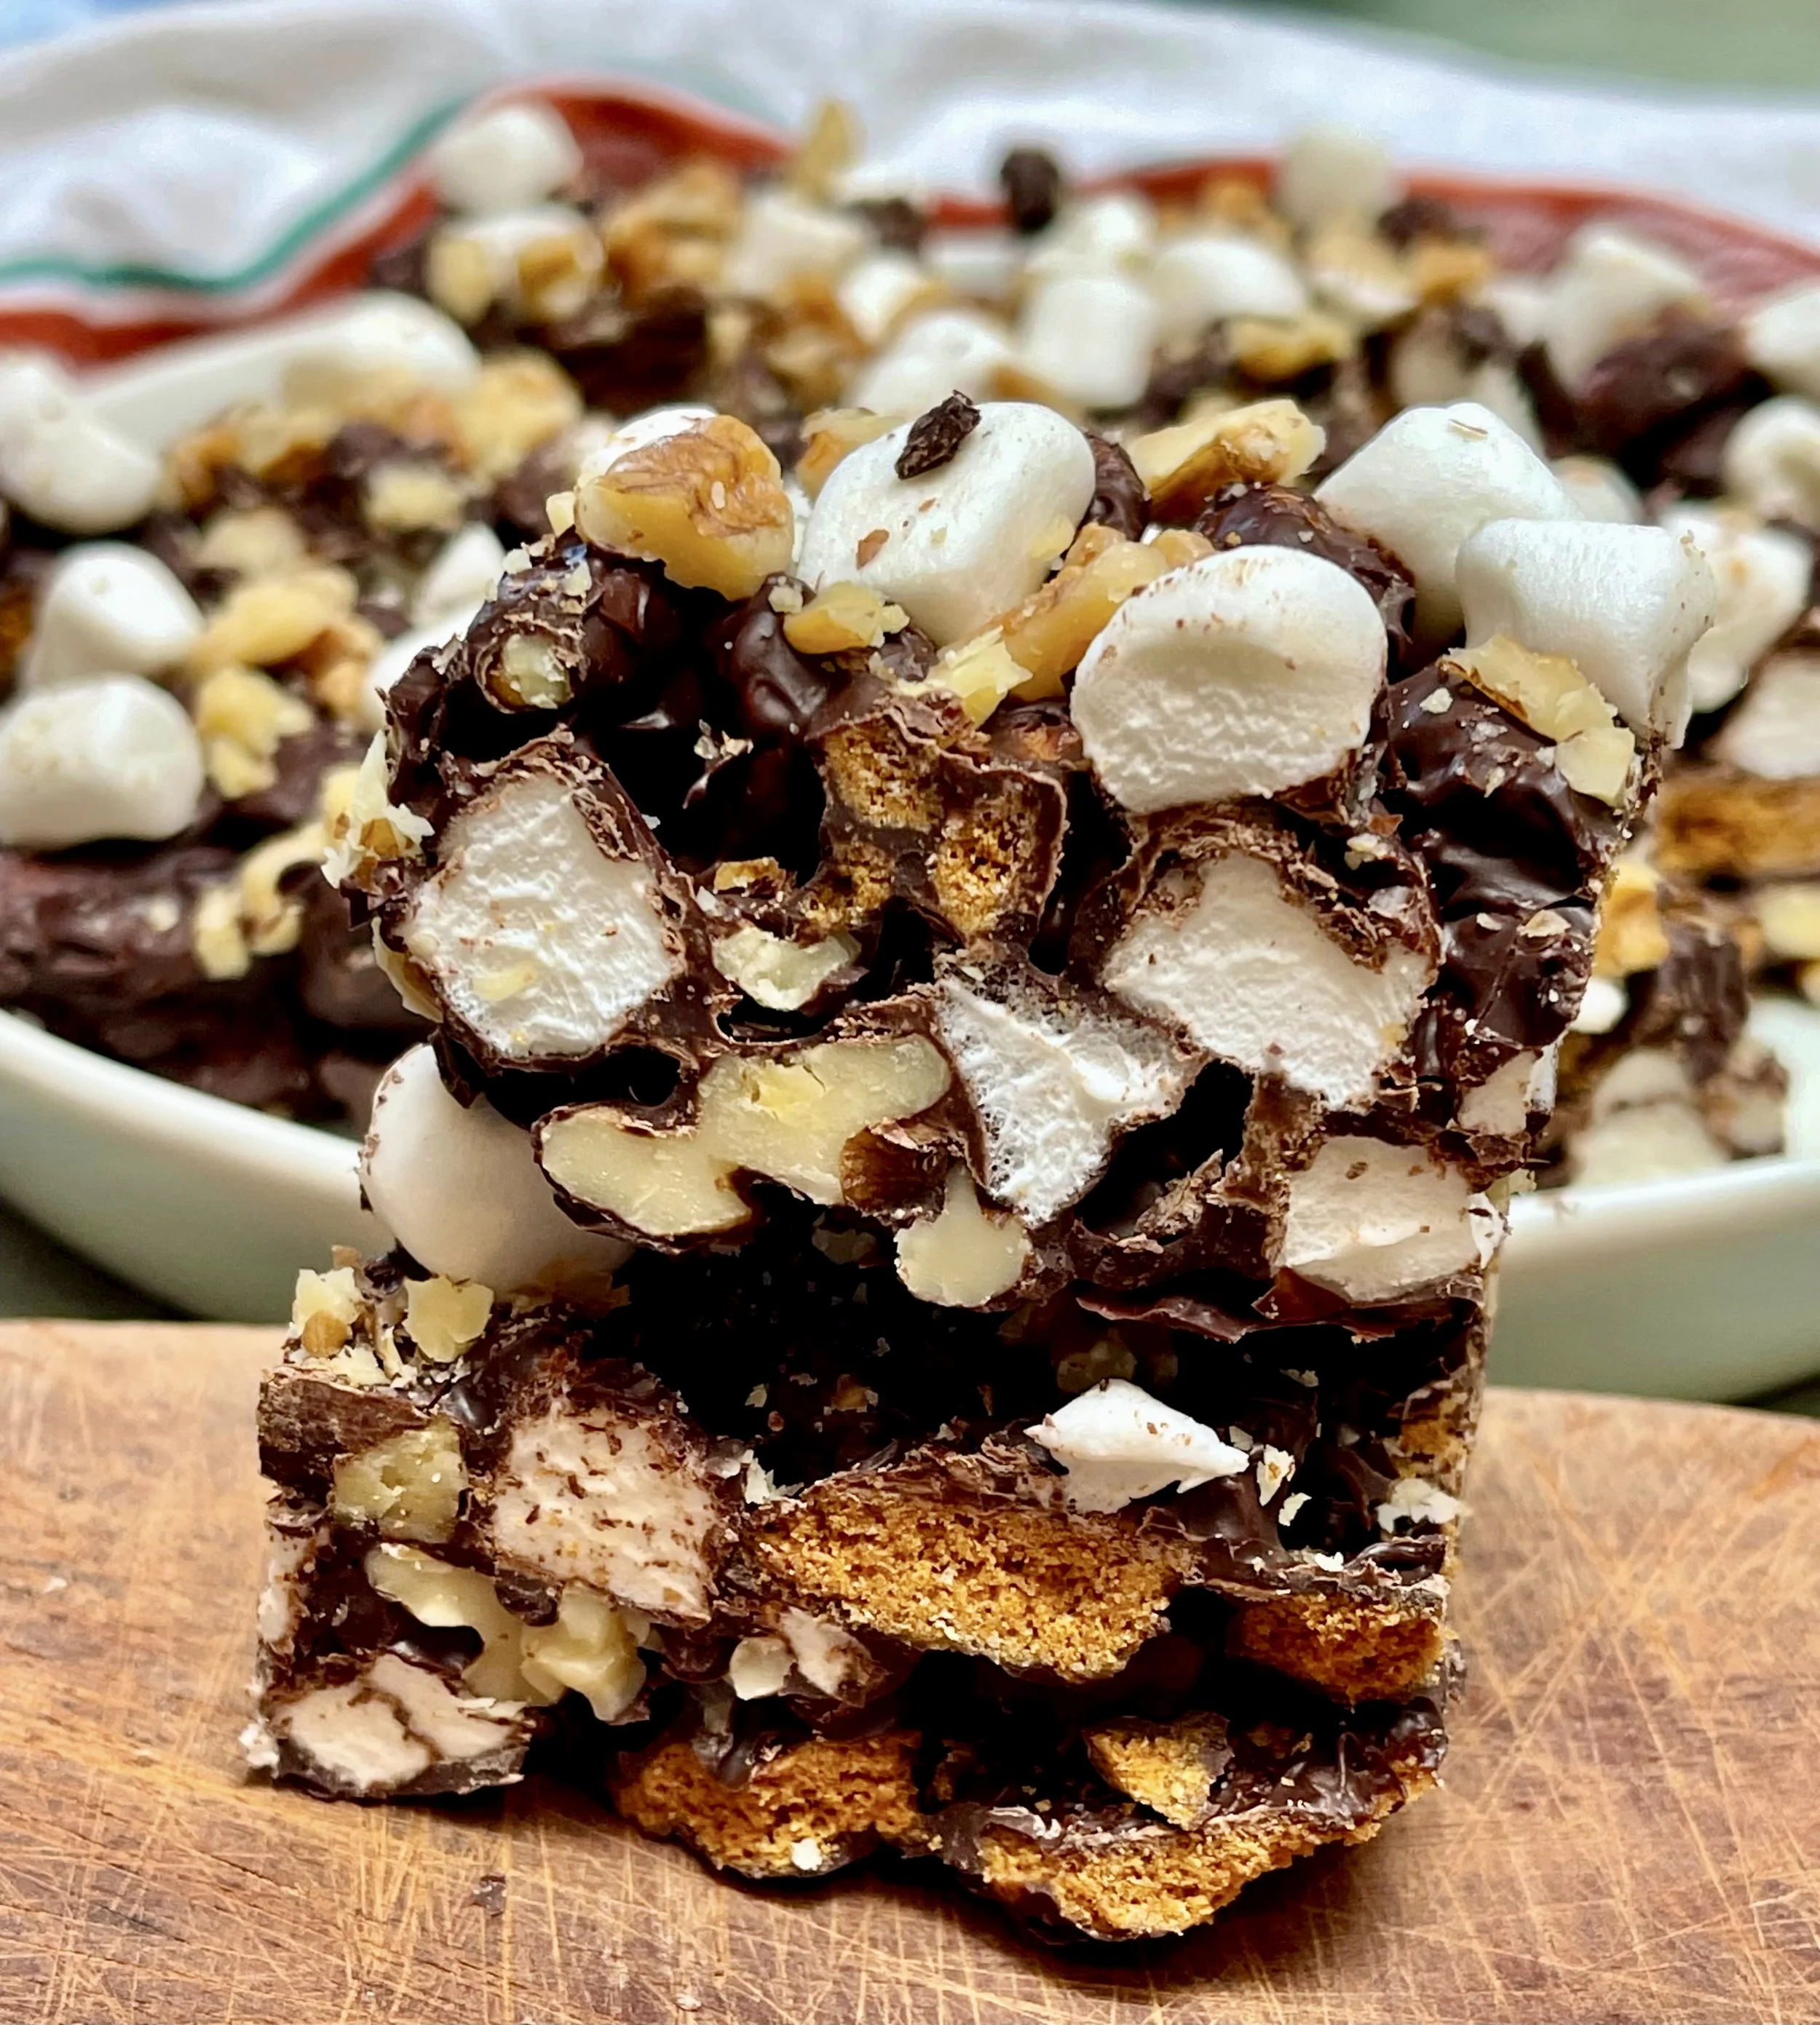
8. Cut and serve. Once it is set, lift the block out of the pan using the parchment paper “handles.” Place the block on a cutting board. Using a sharp knife, cut into squares. You can make them large bakery-style squares or smaller bite-sized pieces.
Serving and Storing Rocky Road
Homemade candy is a fun treat for the entire family! Here are a few tips for serving and storing.
Portioning
Rocky Road is rich, so small squares often work best. If you are serving this at a party, consider cutting them into small, bite-sized cubes (24) and serving them in mini cupcake liners for easy grabbing.
Serving Suggestions
From birthdays to Christmas to after-school snacks, yummy crunchy chocolate is appropriate for any occasion, all year round!
During the holiday season, I usually add Rocky Road to my dessert tables. Although I love Christmas Fudge, these bars are way easier!
Serve With
These Rocky Road candies pair exceptionally well with hot coffee or a cold glass of milk, as the beverages helps balance the intense chocolate sweetness.
Gifting
Like our White Chocolate Almond Bark and Sugar Cookie Truffles, Rocky Road bars are a wonderful homemade gift for Valentine’s Day, Mother’s Day, Father’s Day, and of course, the winter holidays.
For more ideas, try these Christmas Candy Recipes!
Storage Tips
Because this recipe uses real chocolate and marshmallows, temperature is important.
Room Temperature: If your kitchen is cool (below 70°F/21°C), separate layers with wax paper, and store the candy in an airtight container on the counter for up to 1 week.
In the Fridge: If temps in your kitchen are on the warmer side, the chocolate may bloom or become messy. In that case, store your airtight container in the refrigerator.
Variations
Additions
If you’re a saltaholic like me, a sprinkle of sea salt is a perfect additional touch.
You can also create many other different types of candy recipes using this one as a base. Just replace ingredients with like components.
Shapes
If you rather make Rocky Road candy clusters, skip the baking pan and pull out cookie sheets. Working quickly, use a spoon to scoop out generous dollops from your mixing bowl, place them on the pan, and form clusters.
You can also spread the entire mixture out into a thin layer on a baking sheet to make a Rocky Road Bark. Break into small pieces after everything has cooled.
other Easy-to-Make Desserts
For other incredibly easy, yet ultradelicious desserts, try these:
Caramelized Bananas
5-Ingredient Pumpkin Dip
Flourless PB&J Cookies
Easter Rocky Road
Banana Bread Pudding